
Introduction
The Dutch bucket hydroponic system is a highly efficient and space-saving method for growing a wide variety of plants indoors or outdoors. This system allows you to cultivate your own fresh produce without the need for soil, making it an excellent choice for urban gardeners or those with limited space. By providing a controlled environment and a constant supply of nutrient-rich water, Dutch buckets promote rapid growth and abundant yields.
However, proper setup is crucial to ensure the success of your hydroponic garden. In this guide, I will walk you through the essential steps to establish a thriving Dutch bucket system, enabling you to enjoy bountiful harvests while minimizing water and resource consumption.
Overview of Dutch Bucket Hydroponic Systems and Their Benefits
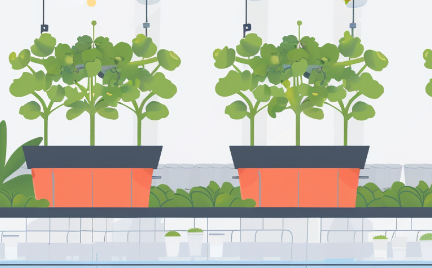
Dutch bucket hydroponic systems represent an innovative approach to gardening, utilizing individual containers or “buckets” for plant cultivation. Each bucket serves as an autonomous growing station, equipped with an air stone to oxygenate the nutrient solution and a supportive growing medium like coco coir or perlite for the plant’s roots.
The standout feature of Dutch bucket systems is their remarkable efficiency in utilizing water and nutrients. Thanks to the continuous recirculation of the nutrient solution, waste is significantly reduced, and plants enjoy a steady supply of vital nutrients. This setup not only conserves resources but also grants gardeners precise control over the growing conditions, allowing for the tailoring of the environment to suit specific plant needs.
The scalability of Dutch bucket systems is another key advantage. The modular nature of the buckets means they can be easily added or removed, offering flexibility to expand or reduce your garden as required. This adaptability makes Dutch bucket systems ideal for both hobbyist gardeners with limited space and commercial growers looking to maximize production.
Furthermore, the system encourages robust root development through air pruning, leading to a dense, healthy root system that enhances water and nutrient absorption. Consequently, plants grown in Dutch bucket systems often exhibit greater vigor and yield than those grown in traditional soil-based setups.
Combining space efficiency, resource conservation, and the capacity to create an ideal growing environment, Dutch bucket hydroponic systems present a sustainable, high-yield gardening solution for both indoor and outdoor horticulture enthusiasts.
Importance of Proper Setup for Successful Hydroponic Gardening
Attaining success in hydroponic gardening hinges on the precision of the system’s setup, especially when implementing Dutch bucket systems. Hydroponic gardening diverges from traditional soil cultivation, depending on a delicately balanced ecosystem where each element is integral to the overall health and productivity of the plants. The meticulous arrangement and installation of Dutch buckets, along with the air pump and air stones, are critical to ensure proper oxygenation and even distribution of nutrients across the system. Neglecting these aspects can result in adverse conditions such as root rot, nutrient imbalances, and inhibited growth.
Choosing a suitable growing medium and rigorously managing the pH and nutrient concentration in the water reservoir are also essential for fostering optimal plant growth. Even slight deviations from the ideal conditions can negatively impact plant vitality and crop yield. By diligently adhering to the setup guidelines and consistently monitoring and fine-tuning the system’s variables, gardeners can cultivate an environment where plants flourish. A well-executed setup not only heightens the likelihood of abundant harvests but also promotes resource efficiency, rendering hydroponic gardening an ecologically sustainable and gratifying practice.
Step 1: Gather the Necessary Materials
Initiating the setup of your Dutch bucket hydroponic system begins with the collection of vital components. The list of essentials encompasses Dutch buckets, an air pump, air stones, a suitable growing medium such as coco coir or perlite, and all required tubing or fittings. Having these materials ready in advance will facilitate a smooth and efficient setup process.
List of Required Components for a Dutch Bucket Hydroponic System
To embark on assembling a Dutch bucket hydroponic system, ensure you have the following key components at your disposal:
- Dutch Buckets: The core containers for your plants, featuring a nutrient solution reservoir at the bottom and a top chamber filled with a growing medium.
- Air Pump and Air Stones: Essential for oxygenating the nutrient solution to promote healthy root growth. Air stones are placed in each bucket’s reservoir, connected by airline tubing to the air pump.
- Growing Medium: A soilless medium is necessary for root support and stability. Coco coir, perlite, or their mixtures are commonly used.
- Nutrient Solution: A specialized hydroponic nutrient mix is required to nourish the plants. Select a formula suited to your plant types.
- Water Reservoir and Pump: A central reservoir holds the nutrient solution, which is circulated by a submersible pump to the buckets.
- Tubing and Fittings: Necessary for connecting the reservoir to the buckets, along with any required valves or connectors for a tight, leak-proof setup.
- pH and EC/TDS Meters: For monitoring and adjusting the nutrient solution’s pH and electrical conductivity (EC) or total dissolved solids (TDS), ensuring optimal plant health.
Securing these components in advance will equip you for a successful setup and maintenance of a productive Dutch bucket hydroponic system.
Choosing the Right Size and Number of Dutch Buckets
When planning your Dutch bucket hydroponic system, the selection of bucket size and quantity is pivotal, tailored to your unique requirements and spatial limitations. Opting for larger buckets provides ample space for root expansion, suitable for bigger plants, yet demands more growing medium and a greater volume of nutrient solution. On the flip side, smaller buckets, while conserving space, are ideal for cultivating compact crops such as herbs or leafy greens, though they may necessitate more frequent replenishment of the nutrient solution and increased attention to plant care.
The decision on how many buckets to incorporate into your system should align with the dimensions of your grow area and the diversity of crops you aim to grow. A prudent approach is to initiate with a feasible number of buckets, allowing for system expansion as your hydroponic gardening proficiency evolves. Additionally, the weight of the buckets when filled should not be overlooked. As Dutch buckets can become significantly heavy once filled, it’s crucial to ensure that your setup can support this weight securely, maintaining both stability and safety.
By thoroughly assessing your objectives, spatial constraints, and crop selection, you can determine the most suitable size and number of Dutch buckets for your hydroponic garden, paving the way for a customized, efficient, and fruitful growing environment.
Step 2: Prepare the Growing Area
With all essential materials at hand, the subsequent phase involves readying the growing area for your Dutch bucket hydroponic system. This step encompasses choosing the perfect spot and arranging the buckets to maximize both plant development and the efficiency of the system.
Identifying the Optimal Location for Your Dutch Bucket System
Securing the right spot for your Dutch bucket hydroponic system is a pivotal step that influences plant health and overall system efficacy. Both indoor and outdoor environments can serve as suitable locations, each presenting unique factors to consider.
For indoor setups, it’s imperative to choose a location that not only fits the system’s dimensions but also ensures sufficient lighting. Spaces with ample natural light from large windows or those designed as greenhouses are ideal. In the absence of natural light, high-quality artificial lighting options, such as LED or high-intensity discharge (HID) lamps, are necessary to meet the plants’ light intensity and spectrum requirements.
Outdoor locations benefit from direct sunlight, yet they introduce variables such as temperature changes, wind, and potential exposure to pests or pollutants. Opting for a protected area or utilizing a greenhouse can help address these concerns. Regardless of the setting, maintaining proper ventilation and air flow is crucial to avoid high humidity levels and support plant vitality. Additionally, the ease of access to water and electricity plays a significant role in the system’s placement.
When choosing the location, it’s also essential to consider the specific light needs of the crops you intend to cultivate. Different plants demand varying levels of light intensity and exposure duration, so tailoring the environment to these requirements is key to achieving maximum productivity.
By thoroughly assessing your space for factors such as light availability, ventilation, and utility access, you can establish an ideal setting for your Dutch bucket hydroponic system, ensuring a prosperous growing environment whether indoors or outdoors.
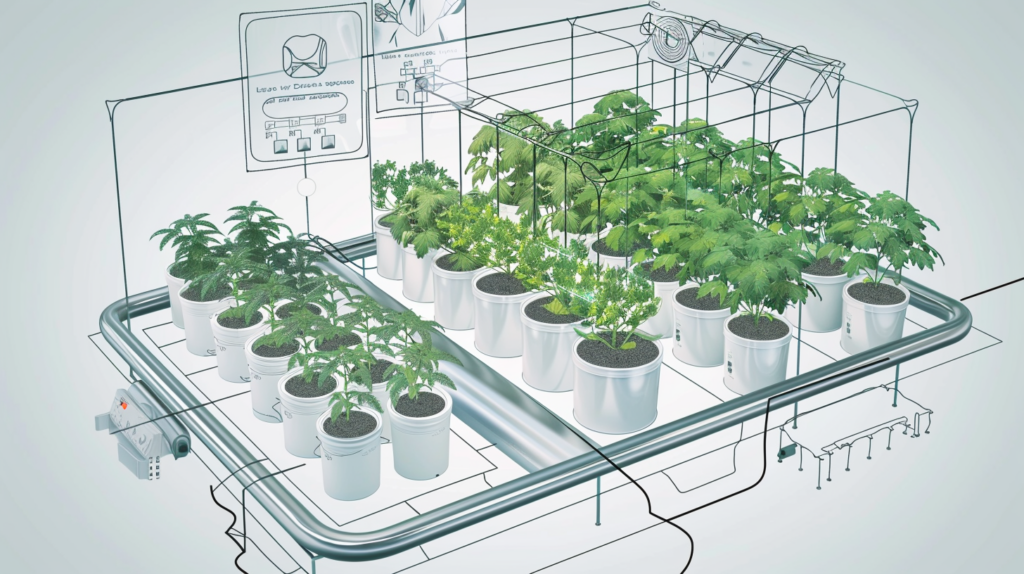
Installing the Dutch Bucket Hydroponic System
After selecting the perfect spot, the next step involves the actual installation of the Dutch bucket hydroponic system. The strategic placement of buckets is crucial for optimal nutrient flow and effective air circulation. It’s important to arrange the buckets to ensure they are easily accessible for routine maintenance and harvesting activities, while also making efficient use of the space you have available.
Begin by connecting the air lines from the air pump to each bucket, making sure that the air stones are correctly placed at the bottom of each bucket’s reservoir. This setup is vital for aerating the nutrient solution, which is key to fostering robust root development. For those installing a more extensive system, organizing the buckets in rows or distinct sections can improve air circulation and simplify system management.
Additionally, take care to securely fasten the air lines and shield them from any potential harm or bending that might impede airflow. Through meticulous arrangement of the buckets and secure connection of the air lines, you will establish an orderly and effective hydroponic system. This careful setup is the groundwork for thriving plant growth and abundant yields.
Step 3: Install the Hydroponic System
With your growing area ready and the Dutch buckets strategically placed, the ensuing step is the assembly of the hydroponic system’s components. This stage involves setting up the air pump and air stones, filling the buckets with your chosen growing medium, planting the crops, and establishing connections to the water reservoir and the nutrient solution.
Assembling the Air Pump and Air Stones
For your Dutch bucket hydroponic system to flourish, proper aeration is key, with the air pump and air stones being central to this process. Start by installing the air pump as per the manufacturer’s guidelines, ensuring it’s in a location with good airflow and connected to a stable power supply.
Then, attach the airline tubing from the air pump’s output to each Dutch bucket. Secure an air stone to the tubing’s end within each bucket, which will then evenly disperse air through the nutrient solution in the reservoir. Opting for high-quality air stones and tubing is crucial for effective air distribution and to avoid any potential leaks or blockages. Durable, hydroponics-grade materials are recommended for their longevity and safety.
After assembling and connecting the air pump and air stones, activate the pump to test for leaks or any airflow restrictions in the tubing. Adjust the airflow as necessary to ensure a steady bubbling in each reservoir. Proper setup of the aeration components is essential for supplying the oxygen needed for robust root growth and efficient nutrient absorption, setting the stage for a successful hydroponic garden.
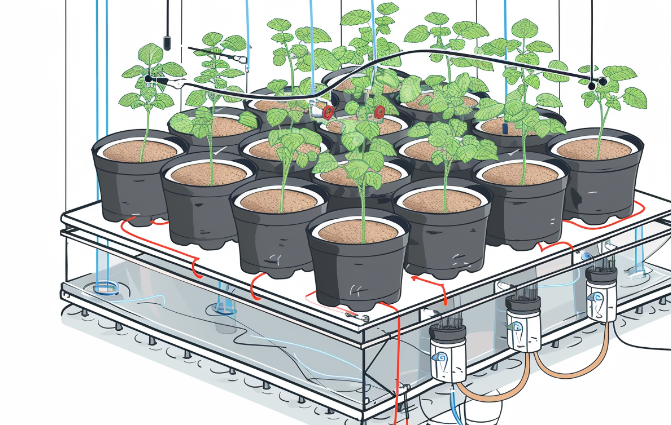
Preparing Dutch Buckets: Growing Medium and Planting
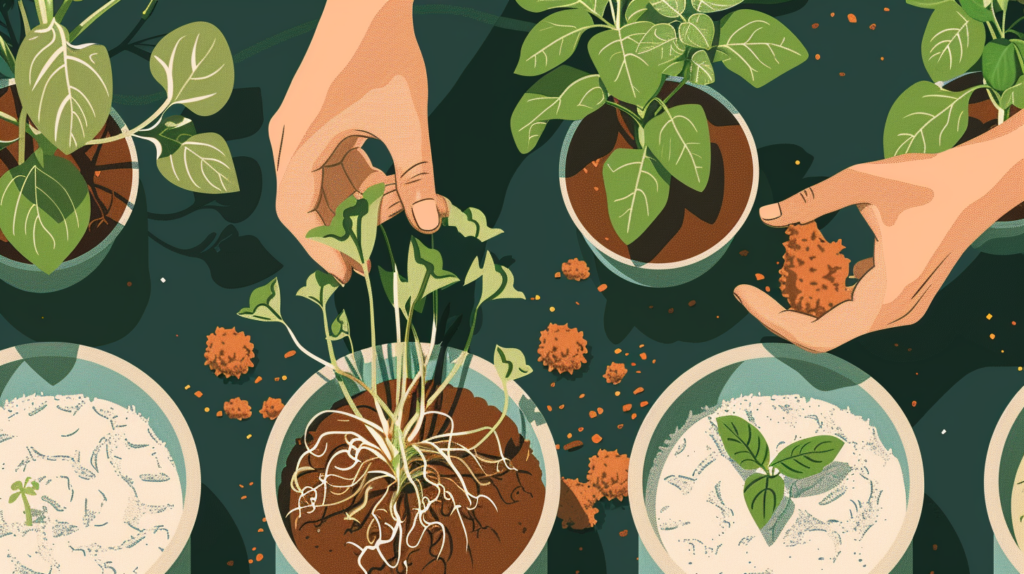
With the air system operational, the next step is to ready the Dutch buckets for your plants. Fill the buckets’ growing chambers with the selected medium, such as coco coir or perlite, ensuring an even distribution and absence of air gaps which might affect moisture uniformity. Following the preparation of the buckets, proceed to plant your crops. Make a central hole in the medium to accommodate the seedling or cutting, covering the roots thoroughly. Press the medium lightly around the plant’s base to anchor it securely.
Account for the eventual size of each plant to avoid overcrowding and ensure each receives adequate nutrients. For instance, larger vegetables like tomatoes or peppers might need an entire bucket to themselves, whereas smaller plants, such as herbs or leafy greens, can be grown more densely. Once planted, moisten the medium gently to settle the roots and eliminate air voids, taking care not to overwater and risk root complications.
By meticulously preparing the Dutch buckets with a suitable growing medium and planting thoughtfully, you create a conducive environment for your plants’ growth, paving the way for a fruitful hydroponic garden.
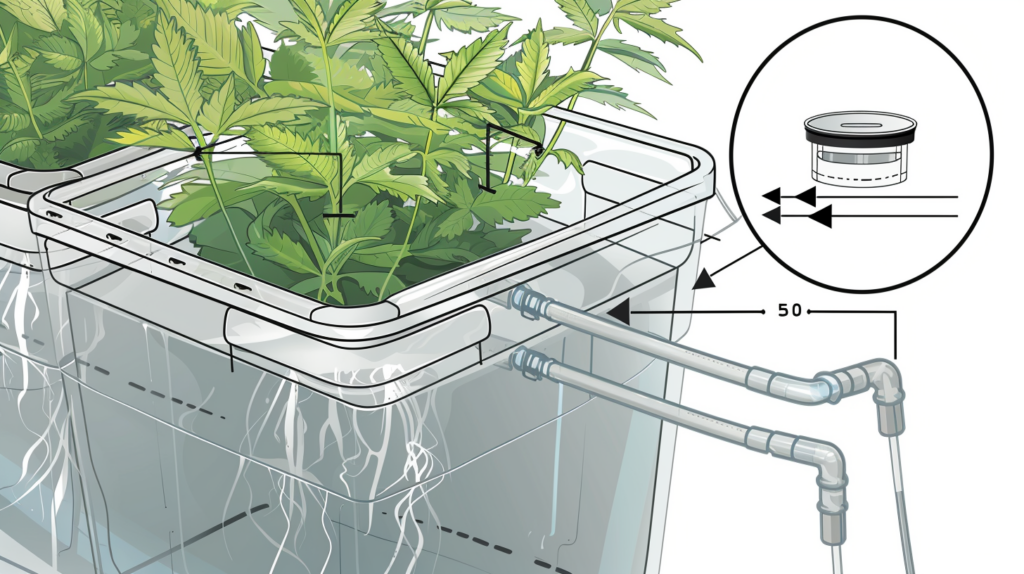
Establishing the Water Reservoir and Nutrient Delivery
With your Dutch buckets ready and the plants set, the subsequent task is to integrate the water reservoir and nutrient solution into your hydroponic setup. Start by filling the reservoir with pristine water and carefully mix in the hydroponic nutrients as per the manufacturer’s guidelines. Utilize a submersible pump to circulate this enriched water from the reservoir to each bucket, employing a system of tubing and connectors to ensure a seamless flow.
Make certain that the connections to the bucket reservoirs are tight, permitting an unobstructed passage for the nutrient solution. Keeping a steady water level within the reservoir is crucial, as is the routine checking and adjusting of nutrient concentrations to promote the best possible growth for your plants. An automatic top-off system or a float valve can be a worthwhile investment, aiding in water level maintenance and reducing the need for frequent manual adjustments.
By correctly setting up the water reservoir and nutrient delivery system, you ensure a consistent feed of vital nutrients to your plants, fostering their growth and optimizing the output of your Dutch bucket hydroponic system.
Step 4: Maintain and Monitor the System
After setting up your Dutch bucket hydroponic system, it’s essential to engage in consistent maintenance and vigilant monitoring to ensure your plants flourish and to preemptively address any issues. Key activities include regulating nutrient concentrations, pruning your plants for optimal growth, and identifying and resolving any operational challenges that emerge.
Regulating pH and Nutrient Concentrations
For the health and productivity of your plants within the Dutch bucket hydroponic system, it’s critical to maintain and adjust the pH and nutrient concentrations appropriately. Conduct regular checks to ensure the nutrient solution provides the ideal balance of elements for your plants. Employ a dependable pH meter to assess the solution’s acidity or alkalinity, aiming for the sweet spot most plants prefer, which is a slightly acidic pH range of 5.5 to 6.5. Should the pH deviate from this ideal range, make corrections with hydroponic-specific pH adjusters.
Beyond pH, the nutrient concentration is another vital parameter to monitor. Utilize an EC (electrical conductivity) or TDS (total dissolved solids) meter to gauge the nutrient strength in the solution. Adhere to the crop-specific and growth stage-appropriate EC or TDS guidelines, replenishing nutrients as necessary. Bear in mind that nutrient needs can vary significantly between different plant types, so tailor your approach based on your crop’s particular requirements.
Maintaining a log of pH and nutrient level changes can be invaluable for tracking trends and refining your approach in subsequent grow cycles. By diligently managing pH and nutrient concentrations, you create an environment where your plants can thrive, leading to robust growth, high yields, and healthy development.
Implementing Pruning and Training for Plant Health
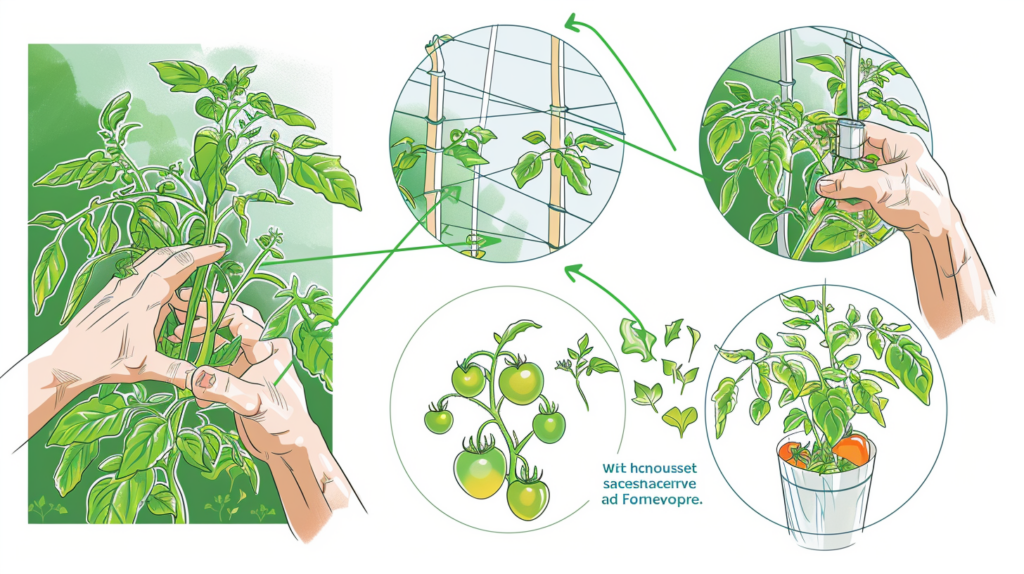
Employing strategic pruning and training methods is vital for enhancing the output of your Dutch bucket hydroponic system. Routine pruning not only facilitates better air circulation but also channels the plant’s energy more effectively towards the production of fruits or flowers, while keeping growth within the spatial limits of the buckets. For climbing plants such as tomatoes or cucumbers, using trellises or cages can provide necessary support and guide vertical growth, which is beneficial for space utilization, air movement, and light access, all contributing to superior fruiting.
When pruning, it’s important to eliminate any foliage that is dead, damaged, or causing congestion, as well as any non-essential shoots or suckers that could detract from the energy of the main stem. Techniques like topping or fiming may also be applied to manage plant height and stimulate a fuller, bushier appearance. Consistent pruning and training of your plants will foster an environment conducive to their best growth, ensuring ample air and light reach each plant, which is key to achieving a more abundant and healthy harvest in your Dutch bucket hydroponic setup.
Addressing Common Hydroponic Challenges
Dutch bucket hydroponic systems, while efficient, can still face typical gardening challenges such as pests, diseases, and nutrient imbalances. Early detection and intervention are key to preserving the health and yield of your garden. Below are strategies for tackling some frequent issues:
- Pests: Pests like aphids, spider mites, and whiteflies can infiltrate even the most controlled environments. Employ integrated pest management (IPM) techniques, including the introduction of beneficial insects, the application of insecticidal soaps, or the use of neem oil to manage these unwelcome visitors.
- Diseases: Humidity can foster fungal diseases such as powdery mildew or root rot. Enhancing air circulation, keeping humidity in check, and using preventive measures like fungicides or beneficial microbes can help safeguard your plants.
- Nutrient Deficiencies: Symptoms such as yellowing leaves, stunted growth, or unusual leaf discoloration often point to nutrient deficiencies. Tailor your nutrient solution to the specific needs of your crops and their growth stages, and regularly monitor and adjust the solution’s strength with an EC or TDS meter.
- Clogged Lines or Air Stones: Mineral deposits or debris can obstruct air lines or air stones over time, hindering oxygen delivery to the roots. Ensure these components are cleaned or replaced regularly to maintain optimal aeration.
By vigilantly observing your Dutch bucket hydroponic system and promptly addressing any arising issues, you can effectively mitigate the effects of pests, diseases, and nutrient problems, keeping your plants vigorous and fruitful.
Step 5: Harvest and Enjoy Your Bounty
The culmination of your hard work in maintaining the Dutch bucket hydroponic system is the rewarding phase of harvesting. When your crops reach maturity and are ripe for picking, it’s time to use the appropriate techniques to harvest them. This final step is not only about enjoying the fruits of your labor but also about ensuring the longevity and continued productivity of your hydroponic system.
Determining the Perfect Harvest Time
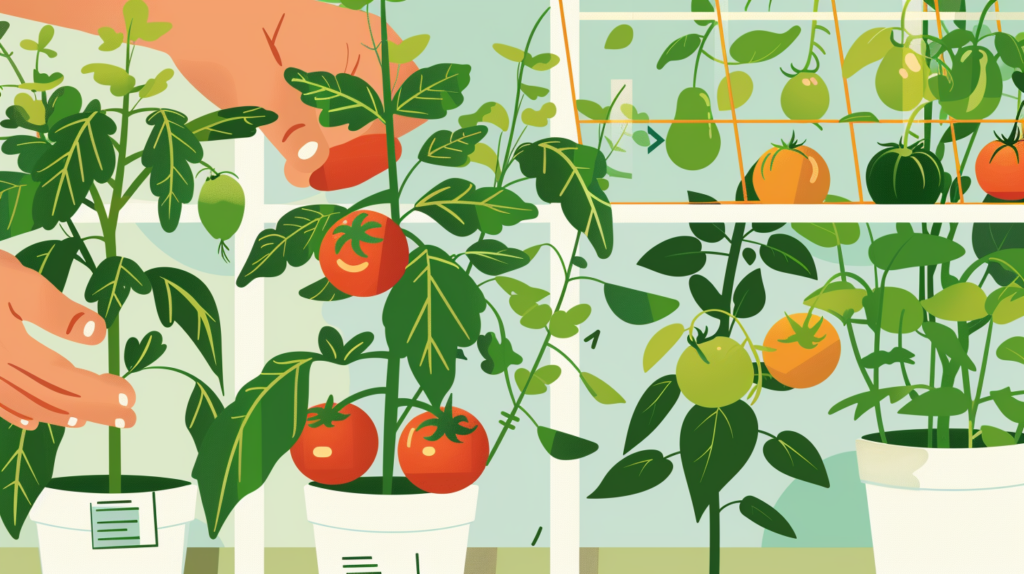
Identifying the optimal moment to harvest your hydroponic crops is key to maximizing their taste, texture, and nutritional benefits. Each type of plant has distinct signs that signal readiness for harvest, making it important to know what to look for in your specific varieties.
For fruit-bearing plants such as tomatoes or peppers, maturity is often indicated by a full, uniform color and a slight softness, with the fruit easily coming off the stem. Leafy greens like lettuce or spinach are best harvested when leaves are full, vibrant, and tender, ideally before they grow too large or start to taste bitter. With root vegetables, such as carrots or radishes, visible tops poking through the medium and achieving the desired size are good indicators.
For herbs, frequent trimming not only promotes fuller growth but also prevents premature flowering, ensuring the best flavor.
Additionally, signs of a plant’s declining health, such as yellowing leaves or wilting, may suggest it’s time to harvest and possibly replace it. By monitoring your plants for these specific maturity indicators, you can ensure that you harvest your hydroponic produce at its prime, enjoying the freshest and most flavorful results.
Mastering Harvesting Techniques for Various Crops
Applying correct harvesting methods is crucial for the health of your Dutch bucket hydroponic system and the quality of your yield. Each type of crop necessitates a particular approach to reduce plant stress and avoid damage. For fruiting vegetables such as tomatoes or peppers, utilize sterile, sharp pruners or scissors to cut the fruit, retaining a short piece of stem. This technique prevents harm to the plant and encourages further fruiting. When it comes to leafy greens like lettuce or kale, employ a sterile, sharp knife or scissors to trim the leaves at the plant’s base, keeping the root system undisturbed for potential regrowth and additional harvests.
For root vegetables, such as carrots or radishes, carefully extract them from the medium, being mindful to avoid root damage or disruption to neighboring plants. Loosening the medium around the plant’s base can facilitate a smoother removal. In the case of herbs, consistent trimming of the stems with clean scissors or pruners is recommended, ensuring to leave enough growth for the plant to become fuller and to delay any premature flowering.
During harvest, handle all plants with care to prevent bruising or other damage to the produce. Additionally, staggering plantings can provide a steady stream of fresh produce over the season. By adhering to these crop-specific harvesting techniques, you’ll not only secure a generous harvest but also sustain the longevity and productivity of your Dutch bucket hydroponic system.
Enhancing the Durability of Your Dutch Bucket System
Ensuring the durability and effectiveness of your Dutch bucket hydroponic system involves a commitment to ongoing maintenance. Here are several strategies to help prolong the functionality of your setup:
- System Cleaning and Flushing: Make it a routine to drain, clean, and flush the reservoir, tubing, and buckets to eliminate algae growth, mineral residues, or organic debris that could lead to blockages or become a breeding ground for diseases.
- Growing Media Replacement: At the end of each crop cycle, dispose of the old growing media and replenish the buckets with fresh media. This practice prevents the build-up of salts and pathogens, providing a clean slate for new plantings.
- Component Inspection and Maintenance: Regularly examine the air pump, air stones, tubing, and connectors for signs of deterioration or damage. Swiftly replacing any compromised parts is crucial to maintaining uninterrupted airflow and water circulation.
- Crop Rotation: Introduce a variety of crops into your rotation to avoid depleting specific nutrients and to minimize the chances of pest and disease outbreaks associated with certain plant families.
By adhering to these maintenance tips and keeping a watchful eye on your system’s condition, you can significantly extend the life of your Dutch bucket hydroponic system, ensuring it continues to yield abundant harvests over time.
Conclusion
Embarking on the journey of establishing a Dutch bucket hydroponic system involves meticulous preparation and ongoing care. The payoff, however, is the satisfaction of harvesting plentiful, fresh produce right from your own indoor or outdoor garden. Adhering to the detailed guidance provided and committing to regular system upkeep will set you on the path to a flourishing hydroponic garden.
Summary of Essential Steps for Dutch Bucket Hydroponic Setup
To successfully launch a Dutch bucket hydroponic garden, adhere to these fundamental steps: Start by collecting all required components, such as Dutch buckets, an air pump, air stones, and a suitable growing medium. Next, ready your growing space by selecting an optimal location and arranging the buckets appropriately. Proceed to assemble the system’s components, including the air pump, air stones, and the water reservoir. Establish connections for the nutrient solution, then populate the buckets with the growing medium and your chosen plants.
Ongoing system care involves monitoring and adjusting pH and nutrient concentrations, regular plant pruning, and addressing any operational challenges that arise. Culminate your efforts by harvesting your crops with the correct techniques, and ensure the longevity of your system with consistent maintenance.
Embracing the Adventure of Hydroponic Gardening
Now that your Dutch bucket hydroponic system is operational, seize the chance to experiment with this innovative gardening method. Venture into growing an array of plants, from aromatic herbs and lush greens to succulent tomatoes and zesty peppers. Delight in the process of nurturing fresh, nutrient-packed produce in your own space, all while conserving water and reducing your ecological footprint. Hydroponic gardening offers more than just a fulfilling pastime; it’s an eco-friendly approach to deepen your bond with nature and enjoy the bounty of your dedicated efforts.