Introduction
As an avid hydroponic gardener, you understand the importance of maintaining a clean and well-functioning system. Regular cleaning is crucial for ensuring optimal plant growth, preventing disease, and maximizing yields. This article will guide you through the five essential steps to effectively clean your hydroponic setup. From preparing the necessary supplies to thoroughly cleaning each component, these steps will help you maintain a pristine environment for your plants to thrive.
By following this comprehensive cleaning process, you can ensure that your hydroponic system operates at peak efficiency, providing your plants with the ideal conditions for maximum yield and healthy growth.
Importance of Regular Cleaning for Hydroponic Systems
Maintaining a pristine and efficient hydroponic system is crucial for fostering successful plant growth and ensuring abundant yields. Overlooking the necessity of routine cleaning can result in the accumulation of detrimental substances, including algae, bacteria, and mineral residues. These contaminants can adversely affect your plants’ health and diminish the system’s overall performance. A meticulously cleaned hydroponic setup guarantees that the nutrient solution is balanced and devoid of pathogens, enabling your plants to uptake essential nutrients for their optimal growth.
Moreover, a sanitized environment significantly reduces the likelihood of root diseases and other plant ailments, which have the potential to rapidly propagate and ruin your entire harvest. Consistent cleaning also aids in averting obstructions in the system’s tubing, pumps, and other mechanisms, facilitating seamless water and nutrient flow. This not only encourages robust root development but also enhances the efficiency of your hydroponic system, thereby minimizing the possibility of expensive maintenance or replacements in the future.
Overview of the 5 Essential Steps
This comprehensive guide will walk you through the five indispensable steps to effectively clean your hydroponic system.
Firstly, we’ll cover the necessary preparations, including gathering the requisite supplies and shutting down the system. Secondly, we’ll delve into cleaning the reservoir, ensuring it’s free from debris and algae buildup. Thirdly, we’ll focus on meticulously cleaning the growing trays, net pots, and other components. Fourthly, we’ll tackle the tubing and pumps, flushing them with cleaning solutions and replacing any worn parts. Lastly, we’ll reassemble the system, fill it with fresh nutrient solution, and prepare for replanting.
By adhering to these steps, you’ll maintain a pristine environment for your plants to thrive.
Step 1: Prepare for Cleaning

Before embarking on the cleaning journey, it’s essential to assemble all the necessary supplies and equipment. This collection should include cleaning agents, brushes, gloves, and any tools needed for dismantling the system’s components. Additionally, the system is shut down, and the plants are carefully extracted to safeguard them from any potential harm during the cleaning process.
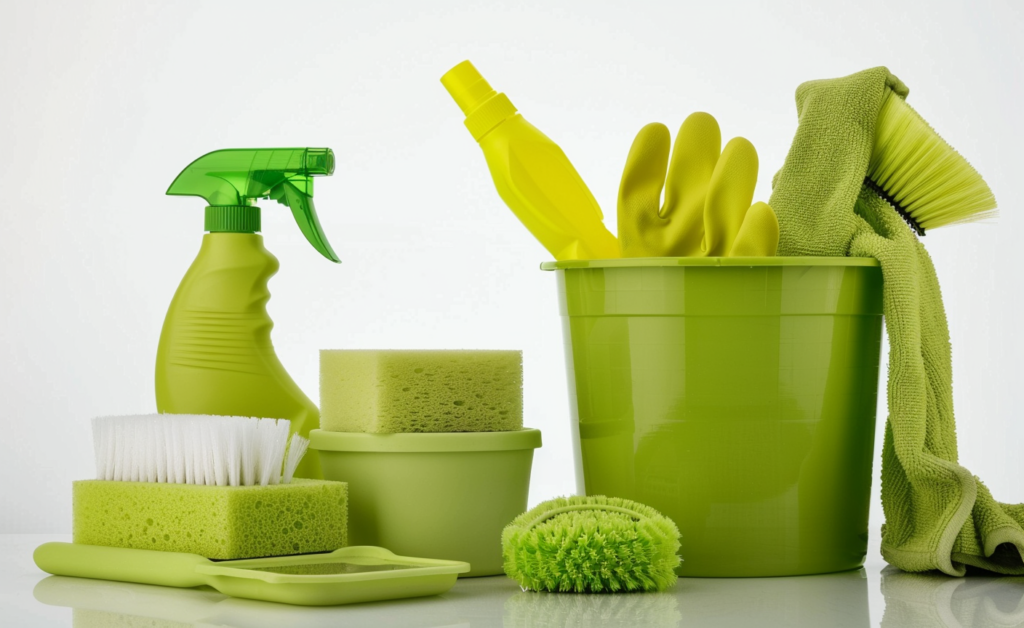
Gather Necessary Supplies and Equipment
For a comprehensive and effective cleaning, having the appropriate supplies and equipment is crucial. Begin by selecting a gentle, plant-safe cleaning agent designed specifically for hydroponic systems. A soft-bristled brush will be necessary for gentle scrubbing, alongside a bucket or container for preparing the cleaning mixture. To safeguard your hands, don a pair of protective gloves.
Additionally, keep a clean cloth or paper towels at hand for drying surfaces. If disassembly of any system components is required, ensure tools like pliers or wrenches are easily accessible. Preparing all these items in advance will facilitate a smooth cleaning operation, eliminating any potential interruptions or delays.
Shut Down the System and Remove Plants
Prior to initiating the cleaning routine, it’s imperative to power down the entire hydroponic system. This step includes deactivating the pumps, air stones, and any other electrical elements to avert potential mishaps or damage during the cleaning phase. With the system deactivated, proceed to delicately extract the plants from their growth mediums or trays. It’s important to handle them with care to prevent harm to the fragile roots or leaves. If feasible, transfer the plants to a temporary holding space or container that’s filled with nutrient solution, ensuring they remain nourished and vigorous throughout the cleaning duration.
As an alternative, positioning them in a shaded spot and lightly misting them at intervals can help avert dehydration or stress. This moment also serves as an opportunity to examine the plants for any indicators of pests, diseases, or nutritional shortfalls. Addressing these concerns prior to replanting contributes to a healthy commencement and fosters optimal growth in the refreshed system. It’s crucial to treat the plants attentively and provide them with the necessary care during the cleaning endeavor to minimize stress and safeguard their health.
Drain the Nutrient Solution
Once the plants are securely relocated, proceed to empty the nutrient solution from the reservoir. Identify the drain valve or outlet to release the solution entirely. In the absence of a specific drain, you might need to gently tilt or elevate the reservoir for emptying. Exercise caution to prevent any spillage onto electrical units or delicate regions.
With the reservoir now empty, you’re set to move on to the subsequent phase of its comprehensive cleaning. Draining the nutrient solution is pivotal not only for an in-depth cleaning but also to avert any potential cross-contamination with the cleaning agents.
Step 2: Clean the Reservoir

With the nutrient solution drained, attention shifts to meticulously cleaning the reservoir. This pivotal step entails eliminating any accumulated debris, algae growth, or mineral deposits that may have amassed over time. A comprehensive cleaning of the reservoir ensures a fresh start for your hydroponic system, fostering optimal conditions for plant growth.
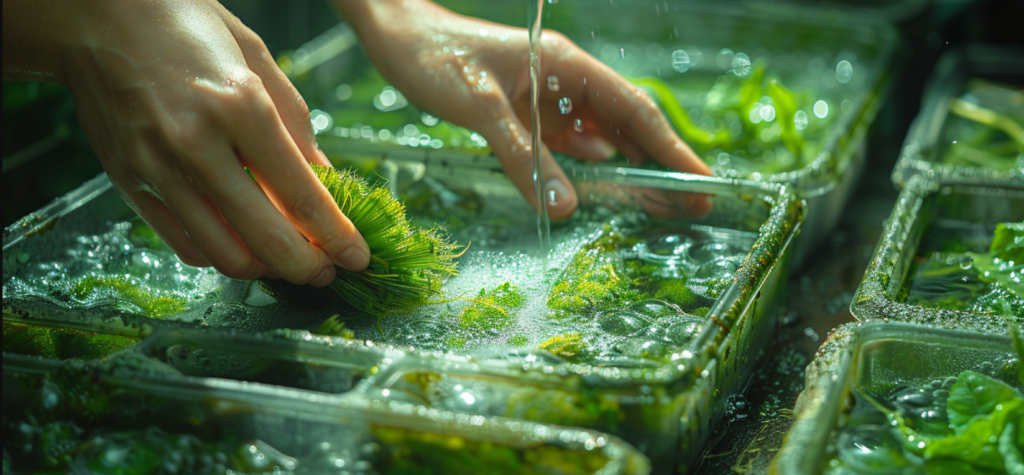
Remove Any Debris or Algae Buildup
Initiate the reservoir cleaning process by meticulously inspecting the interior for any visible debris, algae growth, or mineral accumulation. Employ a small brush or scraper to gently dislodge any stubborn deposits or residue adhering to the sides or base of the reservoir. Pay close attention to corners and crevices, as these areas are prone to harboring grime over time.
If significant algae growth is detected, it’s imperative to remove it thoroughly. Algae can not only obstruct the system but also deplete the nutrient solution of essential minerals and oxygen, impeding plant growth. Utilize a soft-bristled brush or a specialized algae scrubber to gently scrub away any green or brown patches. As you work, exercise caution to avoid scratching or damaging the reservoir’s surface, as this could create potential breeding grounds for future contaminants.
If you encounter any particularly tenacious buildup, consider soaking the affected area with a mild cleaning solution before scrubbing. Remember to exercise caution when cleaning the reservoir, as it may contain sharp edges or tight spaces. Take your time and ensure that every nook and cranny is thoroughly cleaned before proceeding to the next step.
Scrub the Reservoir with a Mild Cleaning Solution
Following the removal of any visible debris or algae, proceed to deep clean the reservoir using a mild cleaning solution. Begin by preparing the solution as per the manufacturer’s guidelines to ensure it’s correctly diluted for both safety and efficacy. With the solution ready, employ a clean brush or sponge to scrub the reservoir’s interior surfaces thoroughly.
Focus particularly on areas with stubborn stains or mineral deposits. The brush’s gentle abrasion, in tandem with the cleaning solution, will aid in breaking down and lifting any lingering grime or residue. Ensure you scrub every corner, crevice, and difficult-to-access area thoroughly. A comprehensive clean is vital to eliminate any contaminants that could potentially harm your plants or reduce your hydroponic system’s efficiency. For any especially resistant buildup or stains, consider allowing the cleaning solution to soak for a few minutes before scrubbing again. This soaking period allows the solution to penetrate and dissolve the deposits, facilitating easier removal.
During the scrubbing process, be cautious to prevent the cleaning solution from splashing onto any electrical components or sensitive areas. Approach the task methodically and carefully to achieve a thorough clean without damaging the system. After you’ve meticulously scrubbed the entire reservoir, you’re ready to advance to the next critical phase: rinsing.
Rinse Thoroughly with Clean Water
After thoroughly scrubbing the reservoir with the cleaning solution, it’s imperative to rinse it meticulously with clean water. This step ensures the elimination of any residual cleaning agents or dissolved contaminants that could potentially harm your plants or disrupt the nutrient balance within the system. Employ a garden hose or a clean bucket to flush the reservoir multiple times, paying close attention to any corners or crevices where the solution may have accumulated.
Continue rinsing until the water flows clear and free of any suds or discoloration. A comprehensive rinse is essential for maintaining a pristine environment conducive to your plants’ thriving growth.
Step 3: Clean the Growing Trays and Components
With the reservoir thoroughly cleaned and rinsed, the next phase involves meticulously cleaning the growing trays and other components of your hydroponic system. These areas can harbor various contaminants, necessitating a comprehensive cleaning to ensure optimal plant growth and system efficiency.
Disassemble and Clean Growing Trays, Net Pots, and Other Components
Disassembling the growing trays, net pots, and other components is imperative for a comprehensive cleaning. Begin by carefully removing each piece, taking note of their assembly for easy reassembly later. Inspect each component for any visible buildup, algae growth, or mineral deposits.
Once disassembled, prepare a fresh batch of the mild cleaning solution and use a soft-bristled brush to meticulously scrub each piece. Pay close attention to crevices, holes, and any areas where debris may have accumulated. For net pots or components with intricate designs, consider using an old toothbrush or a small, stiff-bristled brush to access those hard-to-clean spots. As you clean, exercise caution around sharp edges or delicate parts that could be damaged by excessive scrubbing. Gently dislodge any stubborn buildup, but avoid applying too much pressure or force. If you encounter any particularly tenacious stains or mineral deposits, consider allowing the components to soak in the cleaning solution for a short period before scrubbing again.
This soaking period will enable the solution to penetrate and break down the buildup, facilitating easier removal. Remember to clean not only the visible surfaces but also the underside and any hidden areas of the components. Neglecting these areas could lead to the transfer of contaminants back into the clean system. Once you’ve thoroughly scrubbed and cleaned each piece, rinse them meticulously with clean water to remove any remaining cleaning solution or residue. Allow the components to air dry completely before reassembling them into the hydroponic system.
Use a Soft-Bristled Brush and Cleaning Solution
For cleaning the growing trays, net pots, and other components, employing the correct tools and cleaning solutions is crucial for achieving a thorough and safe clean. Opt for a soft-bristled brush for scrubbing these components, as its gentle abrasion effectively dislodges stubborn buildup without risking scratches or damage to the surfaces. Combine the use of the soft-bristled brush with a mild, plant-safe cleaning solution, specifically developed for hydroponic systems.
Such solutions are adept at breaking down and eliminating contaminants like algae, mineral deposits, and organic matter, all while ensuring no harmful residues are left that could adversely affect your plants. Adhere to the manufacturer’s guidelines for diluting the cleaning solution to the correct concentration. Utilizing a solution that is too concentrated might damage the components or leave residues that could impede plant growth.
As you scrub, give special attention to crevices, corners, and difficult-to-reach spots where contaminants are prone to gather. The soft bristles of the brush facilitate access to these areas, guaranteeing a comprehensive clean. It’s imperative to rinse the components thoroughly post-scrubbing to eliminate any residual cleaning solution or dislodged debris. This rinsing step is vital to avert any potential contamination or chemical residues from compromising the integrity of the freshly cleaned hydroponic system.
Rinse and Allow to Air Dry
Following the meticulous scrubbing of the growing trays, net pots, and other components with the cleaning solution and soft-bristled brush, a thorough rinse with clean water is imperative. This crucial step guarantees the removal of any lingering cleaning agents or dissolved contaminants, safeguarding your plants from potential harm and ensuring the nutrient balance within the system remains undisturbed. Carefully rinse each component, giving special attention to crevices or difficult-to-access areas where the solution might have collected.
After rinsing, arrange the components on a clean surface or drying rack, permitting them to air dry entirely before the reassembly of the hydroponic system commences.
Step 4: Clean the Tubing and Pumps
After ensuring the reservoir and growing components are thoroughly cleaned, the focus shifts to the tubing and pumps responsible for circulating the nutrient solution throughout your hydroponic system. These components play a vital role in maintaining proper water and nutrient flow, underscoring the importance of their cleanliness for achieving optimal plant growth.
Flush the Tubing with a Cleaning Solution
To eliminate any buildup or blockages that have formed over time, flushing the tubing with a cleaning solution is a critical step. Start by detaching the tubing from both the reservoir and pump to ensure you can access both ends. Mix a fresh batch of the mild cleaning solution, adhering to the manufacturer’s guidelines for the correct dilution. Then, using a funnel or another appropriate container, gently introduce the cleaning solution into one end of the tubing.
As the solution makes its way through, it will assist in dislodging and flushing away any debris, algae, or mineral deposits clinging to the tubing’s interior walls. Should you come across any persistent blockages or buildup, a soft-bristled brush or pipe cleaner may be employed to carefully clean the tubing’s inside. Exercise caution to avoid scratching or damaging the tubing material, as such damage could serve as a haven for future contaminants. After flushing the tubing’s entire length, it’s important to rinse it thoroughly with clean water to expel any leftover cleaning solution or loosened debris.
This can be achieved using a garden hose or a clean bucket, ensuring the water emerges clear. Thoroughly flushing and cleaning the tubing is vital for maintaining unimpeded water and nutrient circulation within your hydroponic system, thereby supporting robust plant growth and optimizing system performance.
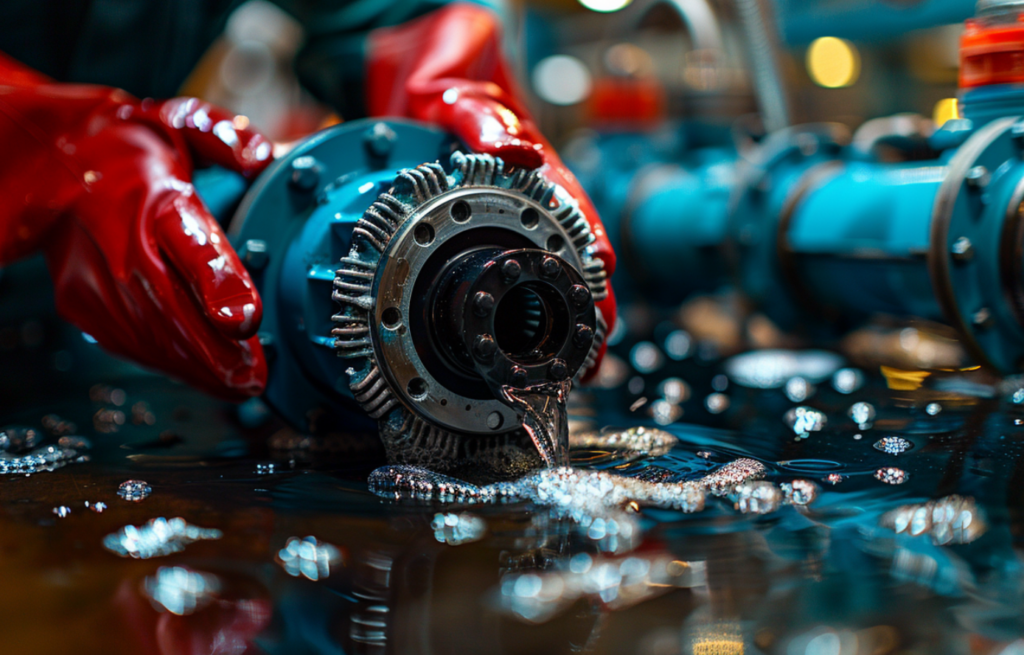
Clean the Pump and Filter Components
Maintaining the cleanliness of the pump and filter components is crucial for the health and efficiency of your hydroponic system. Begin by disassembling the pump with care, adhering to the manufacturer’s guidelines to guarantee correct handling and reassembly. Examine each part for any visible signs of buildup, algae, or mineral deposits. Mix a fresh batch of the mild cleaning solution and employ a soft-bristled brush to delicately scrub the pump housing, impeller, and any other detachable parts.
Focus on crevices, grooves, and areas that are difficult to reach, where contaminants are likely to gather. For filter elements, such as mesh screens or cartridges, soaking them in the cleaning solution for a brief period may be necessary to loosen any entrenched buildup. Gently scrub or shake the filters to remove any debris or residue. While cleaning, be cautious of any fragile components or seals that might be harmed by vigorous scrubbing or harsh chemicals. Refrain from using abrasive materials or tools that could scratch or damage the integrity of the components.
After a thorough cleaning of each piece, ensure they are rinsed well with clean water to eliminate any leftover cleaning solution or debris. Closely inspect the components to confirm they are devoid of any remaining contaminants before you reassemble the pump and filter system. Consulting the manufacturer’s recommendations for specific maintenance or replacement schedules for the pump and filter parts is advisable. Replacing any worn or damaged parts is essential for maintaining optimal performance and averting potential malfunctions or system failures.
Replace Any Worn or Damaged Parts
During the cleaning process, it’s imperative to meticulously inspect all components for any indications of wear or damage. Worn or compromised parts can undermine the efficiency and performance of your hydroponic system, potentially leading to leaks, blockages, or even complete system failures. Should you notice any cracked or broken pieces, worn seals or gaskets, or components exhibiting excessive corrosion or deterioration, it’s advisable to replace them with new, compatible parts.
Consult your system’s manual or the manufacturer for guidance on sourcing and correctly installing replacement parts. Addressing these issues during the cleaning process ensures that your hydroponic setup operates at its peak, fostering optimal plant growth and minimizing the risk of future complications.
Step 5: Reassemble and Restart the System
After ensuring all components are thoroughly cleaned and any required replacements have been made, the next step is to reassemble your hydroponic system and ready it for a new beginning. This final phase is essential in confirming that your setup is primed to offer an optimal growing environment for your plants.
Reassemble the Clean Components
Following the comprehensive cleaning process, it’s time to reassemble all the components of your hydroponic system. Begin by carefully adhering to any instructions or diagrams provided by the manufacturer to ensure proper reassembly. Double-check that all parts are correctly aligned and securely fastened to prevent leaks or malfunctions. As you reassemble the growing trays, net pots, and other components, conduct a final inspection of each piece to confirm no debris or contaminants have found their way back onto the clean surfaces.
If necessary, give them a final rinse with clean water before reinstalling them. Pay close attention to the tubing connections, ensuring they are properly secured and free of any kinks or obstructions that could impede water flow. Reattach the pump and filter components, verifying they are correctly installed and functioning optimally. Once all the components are reassembled, take a step back and visually inspect the entire system for any potential issues or areas of concern. Addressing any problems at this stage will save you time and effort in the long run. With the reassembly complete, your hydroponic system is now ready to be filled with fresh nutrient solution and restarted, providing a clean and optimal environment for your plants to thrive.
Fill the Reservoir with Fresh Nutrient Solution
With the clean components reassembled, it’s time to fill the reservoir with a fresh batch of nutrient solution. Begin by carefully measuring and mixing the appropriate amounts of water and nutrient concentrate according to the manufacturer’s guidelines or your preferred recipe. Ensure that the water source is clean and free of any contaminants that could potentially harm your plants.
Once the nutrient solution is properly blended, slowly pour it into the reservoir, taking care not to splash or spill any onto the surrounding areas or electrical components. If your system has a fill line or maximum capacity indicator, be sure to stop filling once you reach that level. As you fill the reservoir, remain vigilant for any leaks or drips from the tubing connections or other components. If you notice any issues, halt the filling process and address the problem before proceeding. Having a backup plan or secondary container ready in case of any unexpected overflows or spills is advisable.
This precaution will help prevent any potential messes or damage to your growing area. With the reservoir filled with fresh nutrient solution, your hydroponic system is one step closer to being fully operational and ready to support healthy plant growth.
Test and Adjust pH and Nutrient Levels
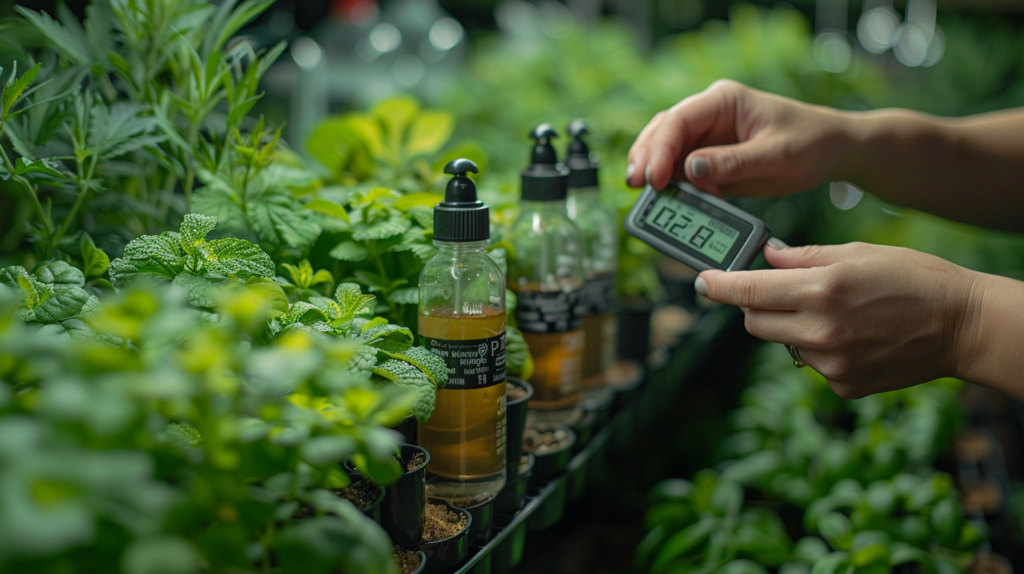
After filling the reservoir with fresh nutrient solution, it’s imperative to test and adjust the pH and nutrient levels to ensure an optimal growing environment for your plants. Proper pH levels are essential for nutrient uptake, as plants can only absorb certain nutrients within a specific pH range. Utilize a reliable pH meter or test kit to measure the solution’s pH level.
Most hydroponic plants thrive in a slightly acidic environment, with a pH range of 5.5 to 6.5 being ideal for most species. If the pH falls outside of this range, you’ll need to adjust it using pH up or pH down solutions, carefully following the manufacturer’s instructions. In addition to pH, it’s also crucial to test the nutrient levels in the solution. Different plants have varying nutrient requirements, so it’s essential to ensure that the solution contains the appropriate levels of macronutrients (such as nitrogen, phosphorus, and potassium) and micronutrients (like iron, calcium, and magnesium). If the nutrient levels are too low, you may need to add additional nutrient concentrate to the solution.
Conversely, if the levels are too high, you may need to dilute the solution with clean water. Always adhere to the recommended dosages and adjust the nutrient levels gradually to avoid shocking your plants. Regular testing and adjustment of pH and nutrient levels are critical for maintaining a healthy and balanced hydroponic system. By ensuring that these parameters are within the optimal range, you’ll provide your plants with the ideal conditions for growth, vigor, and maximum yield.
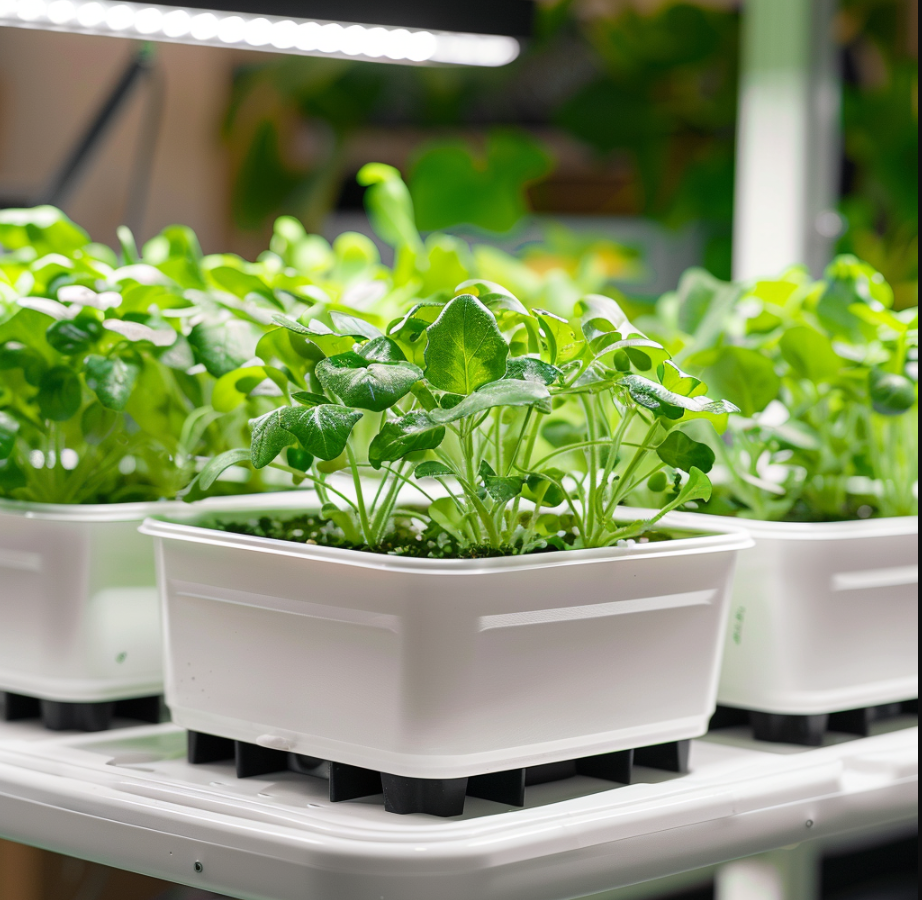
Replant and Monitor the System
With the fresh nutrient solution prepared and the pH and nutrient levels finely tuned, the next step is to replant your hydroponic system. Carefully move your plants from their temporary holding area back into the sanitized growing trays or net pots. Ensure the roots are well submerged in the solution to access the necessary nutrients.
After replanting all the plants, activate the pump and any other essential components to commence the circulation of the nutrient solution. Keep a vigilant eye on the system for any potential leaks, blockages, or other issues that might emerge during the initial startup phase. In the following days, monitor the plants for any signs of stress or nutrient deficiencies. It’s normal for plants to undergo a brief adjustment period post-transplantation, but they should soon adapt and flourish in the clean, optimized environment.
Consistently review the pH and nutrient levels, making any necessary adjustments to sustain the perfect conditions for your plants. Pay attention to the overall system performance, ensuring that water flow, aeration, and other vital functions are working as intended. By attentively replanting and monitoring your hydroponic system following a thorough cleaning, you provide your plants with an excellent beginning in a fresh, contaminant-free setting, paving the way for optimal growth and abundant yields.
Conclusion
Consistent cleaning and maintenance are paramount for ensuring the optimal performance of your hydroponic system and fostering robust plant growth. By adhering to these comprehensive steps, you create a pristine environment for your plants, devoid of contaminants and conducive to maximizing yields.
A well-maintained hydroponic setup not only promotes plant health but also enhances system efficiency, reducing the risk of costly repairs or replacements down the line. Embrace the cleaning process as an integral part of your hydroponic gardening routine, and reap the rewards of bountiful harvests and a thriving, sustainable growing system.
Importance of Regular Cleaning for Optimal Plant Growth
Regular cleaning of your hydroponic system is paramount for achieving optimal plant growth and bountiful yields. A pristine environment, free from contaminants such as algae, bacteria, and mineral buildup, ensures that your plants have unimpeded access to the essential nutrients they require for vigorous growth and development. When left unchecked, these contaminants can deplete the nutrient solution, clog the system’s components, and even introduce harmful pathogens that can stunt or damage your plants.
By maintaining a clean and well-functioning hydroponic setup, you create an ideal environment for your plants to thrive, maximizing their potential for robust growth, vibrant foliage, and abundant yields. Furthermore, regular cleaning helps to extend the lifespan of your system’s components, reducing the need for costly repairs or replacements. A well-maintained system operates more efficiently, conserving resources and minimizing the risk of breakdowns or failures that could jeopardize your entire crop. Investing the time and effort into properly cleaning your hydroponic system is an essential step in ensuring the success of your gardening endeavors.
By prioritizing cleanliness and maintenance, you’ll reap the rewards of healthy, productive plants and a reliable, long-lasting hydroponic setup.
Tips for Maintaining a Clean and Efficient Hydroponic System
To ensure your hydroponic system remains clean and operates efficiently, adhere to these essential tips and best practices:
- Establish a Regular Cleaning Schedule: Create a routine cleaning schedule for your system, whether it’s weekly, monthly, or tailored to the specific needs of your plants and setup. Regular maintenance prevents the accumulation of contaminants and guarantees optimal system performance.
- Use the Right Cleaning Solutions: Opt for high-quality, plant-safe cleaning solutions that are specially designed for hydroponic systems. These solutions effectively eliminate contaminants without leaving harmful residues that could harm your plants or equipment.
- Inspect and Replace Worn Components: During your cleaning routine, thoroughly inspect all components for signs of wear, damage, or corrosion. Promptly replace any parts that are worn or compromised to avoid leaks, blockages, or system failures.
- Monitor pH and Nutrient Levels: Consistently test and adjust the pH and nutrient levels in your system to ensure they stay within the optimal range for your plants. Imbalances can cause nutrient deficiencies, stunted growth, and other problems.
- Practice Good Hygiene: Maintain strict hygiene protocols when handling your hydroponic system. Thoroughly wash your hands, disinfect tools and equipment, and prevent the introduction of contaminants from external sources.
- Keep Detailed Records: Keep a log of your cleaning schedules, nutrient adjustments, and any issues or observations. This record-keeping will assist you in identifying patterns, troubleshooting problems, and refining your maintenance routine over time.
By implementing these tips and maintaining vigilance regarding cleanliness and maintenance, you’ll ensure that your hydroponic system functions at its best, providing your plants with the perfect conditions for vigorous growth and maximum yields.